Here are the pictures of the eclipse. The times are all UTC from
the camera. Based on the analysis below the clock in
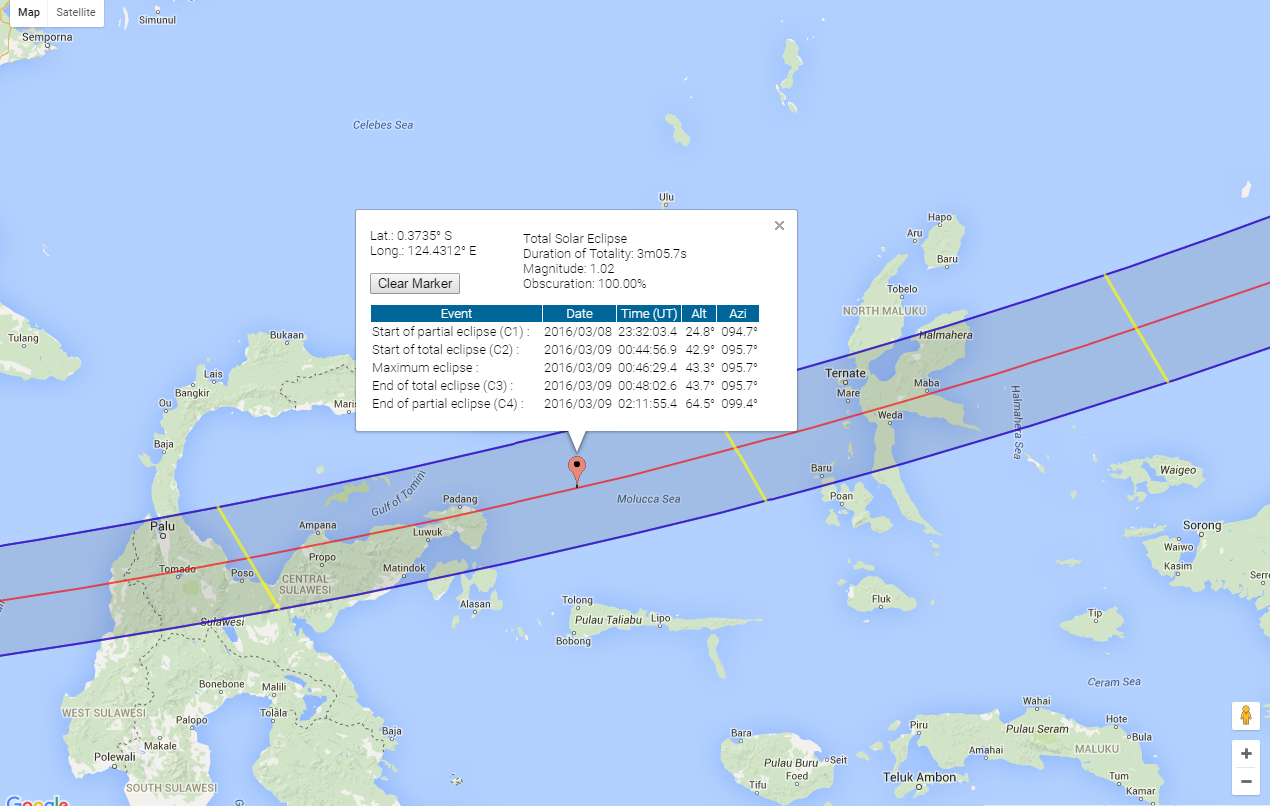
the camera was slow by about 6.5 seconds. C2 was about 9:45 AM WIT (local
time). All exposures were at f 5.6.
Click any of the images for a full size view.
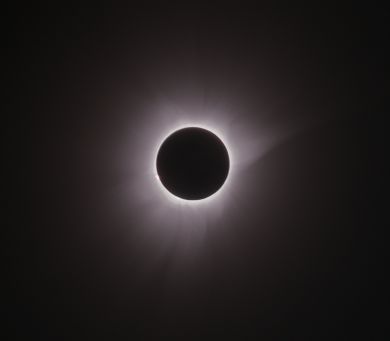
Capturing a solar eclipse with a camera is a notoriously difficult problem. Since I did not want to load up this section with text I will discuss some of the problems below. The following image is a collaboration of Richard Bareford and myself. Richard used a more ambitious setup on the boat and thus was able to capture a much wider range of data than I did. Richard contributed 11 different image and I one. Thanks to him for allowing me to use his data.
To my eyes this version is a good representation of what I saw.
This image is, of course, heavily processed. The goal of the processing is to reveal the details that would normally not be apparent due to the limitations of the camera and display technologies. For a summary of how this picture was produced see the description below.
This is the third attempt at creating this image. I released this version on the boat. This is my first attempt back home.
The bead like effect is caused by the moon's surface being irregular. High parts of the moon block the sun first. The valleys block the sun last. Thus C2 and C3 are usually not instantaneous. Some light leaks through the terrain causing the beads.
1/4000 ISO 200 00:44:48 UTC

In this shot a couple of seconds later the Photosphere is mostly hidden and the thin Chromosphere is visible.
1/4000 ISO 200 00:44:56 UTC

This next shot shows a row of small prominences at 8 to 7 o'clock before they were covered by the sun. The large Prominence and 9 o'clock was visible throughout totality.
1/4000 ISO 200 00:45:03 UTC

This photo was actually taken before the previous, but I put it here to group it with the other corona photos.
1/640 @ISO 200 00:45:01 UTC

The outer corona is significantly dimmer than the bright stuff and requires longer exposures. I partially wimped out by shooting some images at a higher ISO, but stuck to my 1/100 fastest speed. Richard Bareford was much more ambitious. Hence my use of his photos rather than mine in the HDR.
If you would like to get an idea of the exposures needed for full coverage of the corona then see my Libya images.
Note the bright inner parts of the corona are fully saturated.
In the sound track included in the movie I make note that the corona at 6 o'clock has a noticeable bend. You can start seeing this in these images. It is more apparent in the HDR.
These two images were converted by Apple Aperture. Aperture tends to stretch the images which in this case is useful.
1/640 ISO 1600 00:46:28 UTC

1/100 ISO 1600 00:46:26

The Chromosphere is revealed just before the sun's surface is exposed. In 2013 I made a verbal note of this. This year it happened so fast (or I lost attention due to the length of the eclipse) that I did not see this (or failed to verbally note it).
1/4000 @ ISO 200 00:47:50

I like this shot better than the 1/4000 shot taken a second later. It was taken closer to the actual C3 and shows the prominence at 9 o'clock better. In this instance the sun was revealed in a flatter part of the moon. Thus few, if any, beads.
1/640 @ ISO 200

In late April Xavier Jubier, author of Solar Eclipse Maestro approached me to see if we could use my images as a test of the predictions of his program. I located two images that were not a part of my original image set, but were closest in time to the events.
The closest image I had to this was my image 1707 which was taken at an indicated time of 2016:03:09 00:44:50.98. Based on his analysis this corresponds to 00:47:57.7 in real time. It is about 0.6 seconds (+/- 0.2 seconds) before C2.
My image 1773 was the closest to C3. Unfortunately that was a slow exposure, but you can still tell that C3 has occurred in this image and had not yet happened in 1772. Image 1773 was taken at an indicated time of 2016:03:09 00:47:52.04 which compares to a predicted time of 00:47:58.4. This is about .2 seconds after C3.
Averaging the errors between the two predictions implies that the clock in the camera was slow by about 6.5 seconds. Also Solar Eclipse Maestro was spot on with its predictions.

Our group was on board the Le Soléal. Originally we were supposed to view the eclipse at sea near Ternate, Indonesia in the eastern part of the Molucca Sea. As we approached eclipse day the weather forecast for the Ternate area became increasing worrisome. The reality on eclipse day was captured in an APOD. We relocated about 100 miles west to the western part of the Molucca Sea.
 Carrie, Joan, Skip
|
 Looking in the direction of the sun. I am on the left adjusting the camera. Richard to the right. Larry Shore is just visible over my knee |
 The pirate is back.
Arrggh!
courtesy of Larry Shore |
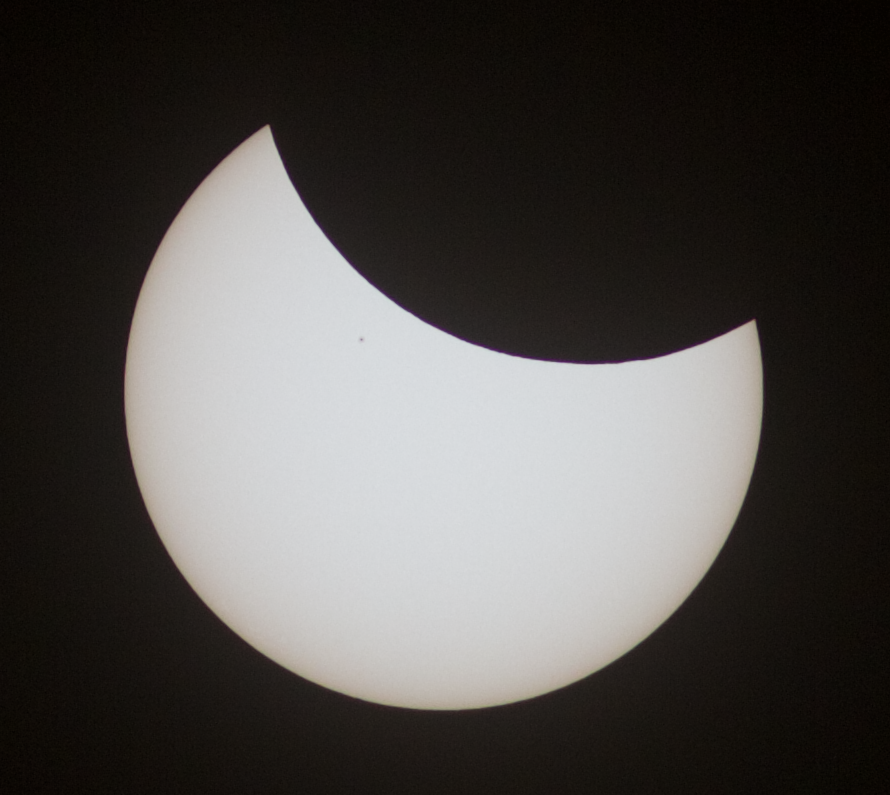 The sunspot I focused on is
about 10 o'clock from the center of the sun. Yeah it is pretty
small. Fortunately I had a SOHO image of the sun so I knew
what I was looking for
|
Based on my experience in prior cruises I opted to mount the camera on a monopod using a 45° adapter to allow the monopod to be closer to vertical at the time of totality. I did not count on the rock stable boat or practically flat sea which made this unnecessary.
I knew that focus was going to be critical. I started about 7:30 right after the sun cleared some distant clouds. I could not live focus since it was too bright to see the camera screen. During the rehearsal run we discovered that even holding a jacket over the camera that it was almost impossible to see the screen. Instead I took an image, went to the side of the ship, looked at the focus, repeat ... It took a while but then I could see a tiny sunspot that I knew was there. Once I was able to see it I knew I had focus. I adjusted once between C1 and C2, but the camera otherwise held focus. Since this camera requires manual focus with a very sensitive ring I had my wife remove my solar filter. I then had to require the sun right before C2 without looking in the camera.
While I might have used the display screen on the camera I opted for more reliable method. I mounted a Televue Sol Searcher on my adapter. This is basically a tiny pinhole camera that displays on a translucent window. I calibrated the pinhole to align with my camera. Before C2 I just had to keep the projection of the pinhole in the window. Presto I could now image C2.
I used my Canon 60Da and 300 mm IS lens again. I tried the extender, but as in 2013 that proved too much magnification. Learning from my previous experience I triggered the camera with my TC 80N3 programmable controller. One shot per second, Full resolution, raw only. The camera had no problem with the data rate.
I was reluctant to shoot at slower than a 1/100 rate using a monopod. That meant dialing back to a +- 2.5 f stop framing centered on 1/640 @ ISO 5.6 @ ISO 200. This is similar to what I have used before, but with 1/2 f stop more open. Richard shot with a tripod and got good results as slow as 1/30!
During the rehearsal I convinced myself I need more exposures. I practiced changing the ISO from 200 to 1600. That got me deeper, but Richards' longer exposures were far better. That is why I asked him to collaborate with me on the HDR image above.
Warning - Techie Stuff
It is easy to capture something by taking a picture of an eclipse. Virtually any camera whether wide angle or narrow, fast exposure or slow, iPhone or telescope with astronomical camera will capture a memory. To get something like what is displayed on this page is more challenging and requires an understanding of the problems involved. This section will hopefully shed light on the problems and describe how (and why) an HDR image as shown at the top of the page is created.
The original images were Canon raw (CR2) images. These are not directly usable, but can be converted into a form that is. Because the next step required Photoshop I initially used it to do the conversion, but Photoshop reduced the precision of the images and stretched them on its own (which affects the HDR composition). I ended up using PixInsight to convert the raws to TIFF (a standard lossless image format) and then used the TIFF images for alignment.
The sun moved between the exposures. To combine the images they must be aligned. While PixInsight has an align function, it did not work properly with this data (probably because the edge of the moon is obscured with flaring in the long exposures). Thus I imported the images into Photoshop and manually aligned them creating a set of aligned TIFF files for the next step.
 |
Now it is time to combine the
images. PixInsight has a tool called HDRComposition for just
this purpose. It reads the data and builds a image where the
longer exposures are scaled to smaller values.
The result looks like just the brightest images, but the data from all (in this case 11) of the images is there scaled and combined so each image contributes the best range of values. |
 |
As seen above initially only the brightest image is visible in the
combined image. That is because the default display is a
simple divide by 256
presentation of the data. The dim stuff resides in the lower
numbers and hence does not make this cut. Thus our first
processing is to remap the data so the dim stuff is visible.
To do this we have to increase the brightness non-linearly.
In this case non-linearly
means that dimmer values are more strongly affected than brighter
values. This process tends to overcompensate which clumps a
lot of stuff in the bright numbers. We then use another tool that analyzes the image for subtle changes in the relative brightness. These represent the structure differences to highlight. It spreads the brightness values over a wider range of numbers, which allows more of the structure to be displayed. After this step the image looks dimmer since data hidden in similar bright values has been spread to more levels of brightness; However, this causes hidden details appear. As you can see the bright flare at 2 o'clock and the arcing corona at 6 o'clock are now visible. |

|
But we are not done. Much more detail lies hidden in the
above image. Next we need to sharpen the edges bring out the more subtle structure. The sharpening method PixInsight uses is hard to explain. However an analogy will make the technique clearer. A way to think of this is like the equalizer on a stereo. If you want to hear the high frequencies of the flutes you adjust the equalizer to amply the higher frequencies more than the others. Now the flutes contribute more to what you hear. PixInsight does something like this, but instead of frequencies it does it on the size of the structures. Does interesting stuff exist at a 16 bits size? Then add more of that size back when creating the processed image. In this case the fine detail of the flares was in small structures while the large flare at 2 o'clock was a larger structure. Each were tweaked so the image was enhanced and as few artifacts as possible introduced. This sounds ad hoc, but there are tools that show how the image is composed so the user has an idea of which way to alter the image. This all makes sense when you see how it works. |
 click for a larger image
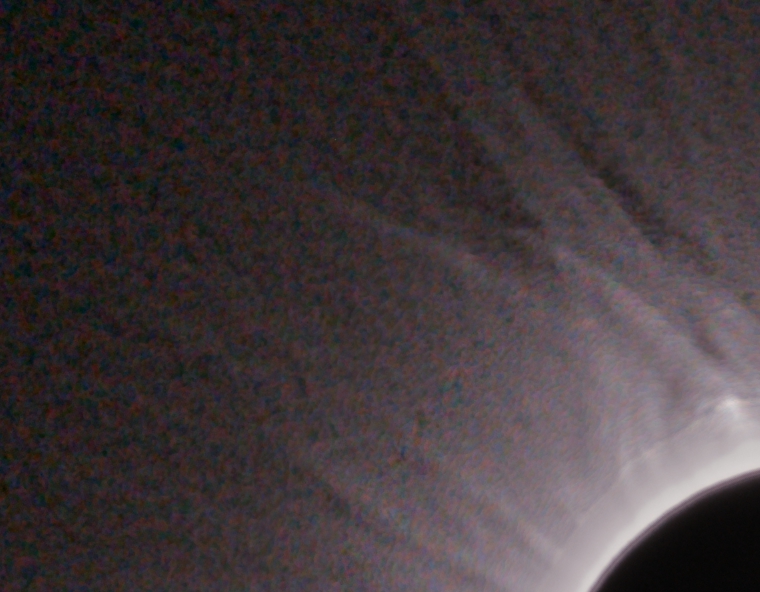
|
The original data probably has some noise in it naturally. The operations above will contribute their own noise. PixInsight has tools to remove the noise by selectively blurring it out. The trick is to blur the noise not the details we previously revealed. The image to the left is the "before" image (a blow up of the image in the previous paragraph). Pixinsight has several tools to reduce the noise in the image. |